Concept for the initial wake-up light prototype
The development of the wake-up light is going at a glacial pace right now, but it is progressing. I've just finalized the concept for the initial prototype this week.
I wrote about my initial ideas for the prototype before, and honestly, I didn't expect those to change much. But I wanted to go through the exercise of thinking this through properly, to make sure I can order all the parts that I need in one go.
That process was very enlightening, and led to more changes than I expected.
My approach
The approach I took was centered on drawing the device, to get clarity on how it would work from a user's perspective. I had already been thinking about that, of course, but drawing it forced me to be much more specific.
And to be clear, I'm not very good at drawing. I don't need to be. It was the act of drawing, that drew out specific problems and questions. The mind is just all too ready to gloss over details, if you let it.
I also happened to show the drawings to a friend who gave me feedback. That wasn't part of the plan, but it was very worthwhile and led to further insights.
The concept
To remind you, the initial prototype isn't a full wake-up light yet. It's just a digital clock face. The goal being to get to a working product as soon as practical, then improve incrementally from there.
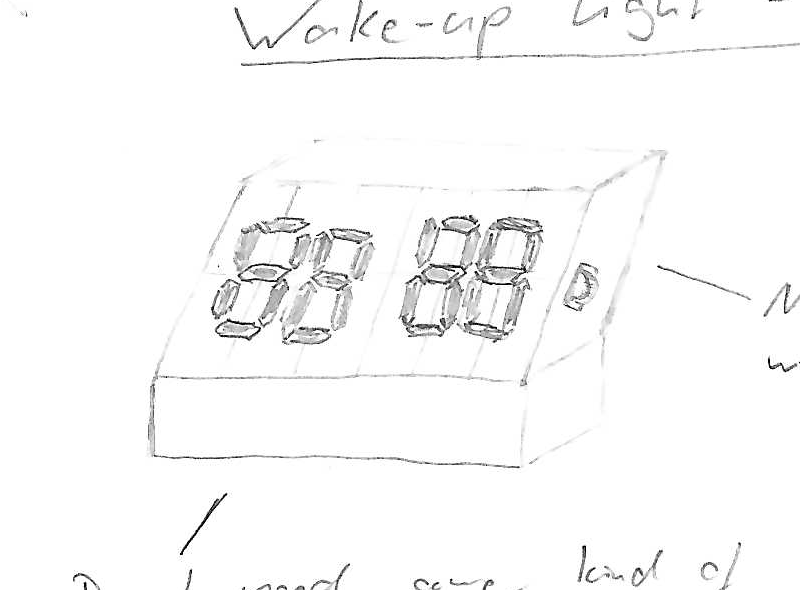
The core of the idea didn't change: A 3D-printed housing, with seven-segment displays to show the time.
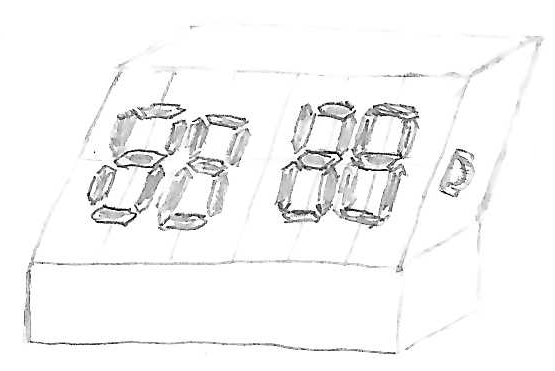
One thing that's changed is that I realized I want to integrate those seven-segment displays into the housing, instead of buying them as pre-made components. That should be practical to do with some LEDs and a bit of 3D printing.
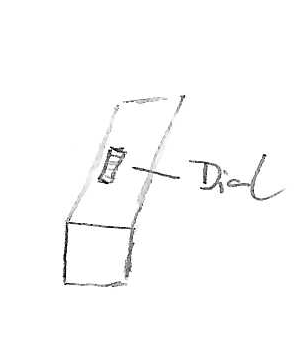
The right side will have a control element to adjust the brightness and set the time.
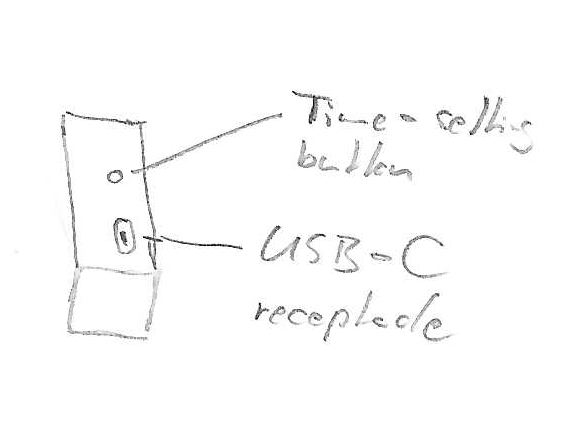
The left side has a button for setting the time; and a USB-C receptacle, for power and updating the firmware.
How did I end up with two input elements, when I initially wanted none for the first prototype? Well, I realized I needed a way to set the time. Then I realized that doing so by accident was too easy, and I needed an extra button. And with the extra button, I could use the control wheel for adjusting the brightness too.
I haven't done a detailed design for the housing yet, but so far I want to print it out of three parts: A front panel with the display, and two halves that hold the front panel and PCB in place.
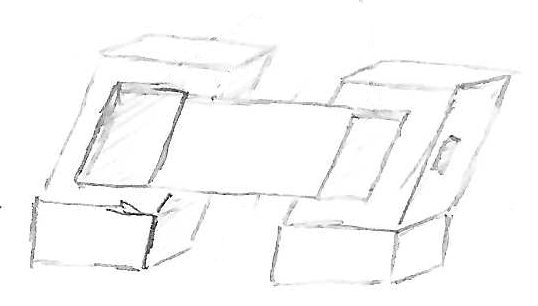
If I can, I'd like to avoid screws and other fasteners completely, but without using glue of course. I want the two halves to snap together using 3D-printed connectors that are integrated into the housing.

Details to be determined (it certainly won't look exactly as pictures here), but based on past experience, I think this should work.
Already available to paid members!
The wake-up light will be open source when released. For now, the designs are private, but already available to paid members of my website!
If you are a paid member and want access, create a GitHub account (if you don't have one already), and send me your account name. I'll hook you up!
If you are not a paid member but want access, you can sign up or change your subscription right here.
Next steps
Next up, I am going to dust off KiCad to design the electronics. Not the full PCB yet, just a wiring diagram, to force me to think through all aspects of that. I want to make sure I know exactly which components I need for the prototype, so I can order those.
I don't know how long this will take, but given the pace I have managed so far, it probably won't be quick. I will post new developments here, so if you follow along, feel free to subscribe (if you haven't already).